|
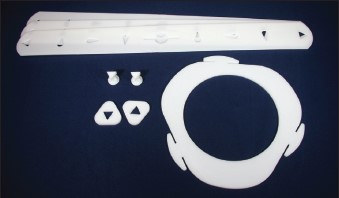
PARTS
LIST:
(3) Paddles with Keyholes
(1) Disc with 3 Key (Tabs) (4", 7" or 15" diameter)
(2) Fastener Pins
(2) Locking Washers
|
 The following conditions VOID the warranty: The following conditions VOID the warranty:
1. Failure to assemble Surge Busters correctly per these instructions.
2. Failure to install the correct amount of Surge Busters calculated for each
specific tank.
3. If Surge Busters begin to come apart inside the tank.
4. If the material being loaded is over 175 degrees.
5. If liquid is loaded/unloaded at too great a pressure/speed without deflectors.
6. If competitor products are mixed with Surge Busters.
|
|
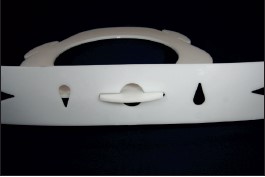
STEP
1
Insert Disk Tab into Keyhole of first Paddle.
|
|
STEP
2
Rotate the Paddle 90 degrees. Then repeat using the other 2 Paddles. |
|
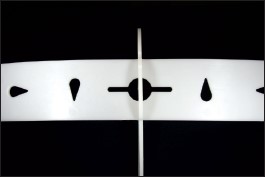
STEP
3
Flex the paddles together at one end and insert the triangular pin (from the outside) through the holes of all 3 Paddles. Using a table to press the end against will help.
WARNING! Failure to install the Fastener Bolt from the OUTSIDE will usually cause Surge Busters to fail and void the warranty.
|
|
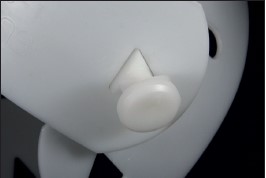
STEP
4
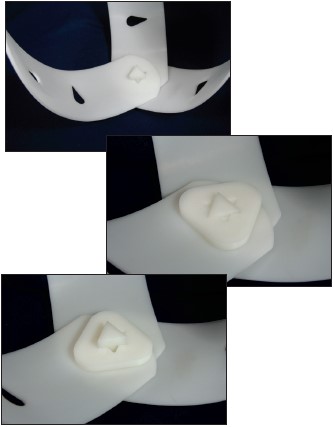
With the 3 paddles on the pin, rotate to their positions at 120 degree intervals. Applying downward pressure on the Disk will hold the paddles in place. Select a Washer, with the side marked DOWN towards the paddles, and install it over the Pin. (The UP side will be towards the inside of the Surge Buster) Depress the Washer forcefully against the paddles and rotate it 60 degrees, releasing it upwards when the 3 recessed triangles align with the tips of the Pin. This locks the Washer in place.
REPEAT STEP 4 FOR THE OPPOSITE END
Begin by inserting the Pin into the Paddle that was on the Inside
position of the first end, then through the middle Paddle, and
finally through the Paddle that is at the outside position of the
first end. This reverses the positions of the paddles from end to
end and is important to the efficient function of the Surge Buster.
Install the locking Washer and the Surge Buster is complete.
Continue the assembly of the calculated number of Surge
Busters for your tank. |
|
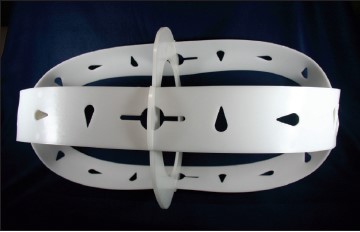
FINISHED PRODUCT
Your assembly of the Surge Buster Baffle System is complete and ready for installation through the manhole of your liquid tank.
If the manhole of your tank is too small, call us about replacing your existing manhole with a larger one. Surge Busters are either 4", 7" or 15" in diameter. |
 If you see loose parts in your tank after using Surge Busters,
immediately If you see loose parts in your tank after using Surge Busters,
immediately
remove allSurge Busters from the tank or discountinue
using the tank until the
issue is addressed. The failure of one
(1) Surge Buster can cause the failure of all! |